Sunday, May 2, 2010

back to school...


Tomorrow is the day. I am going back to high school - but this time as a teacher (well a student/training teacher!). I am pretty nervous, but also incredibly excited about my first placement. I am almost certain that I made the right choice by going back to uni to change my career, and I hope that these coming few weeks cement that certainty. I can't wait for tomorrow to come so I can get started!

We've been doing a bit of cooking this weekend including these 'blondies'. I had never had a blondie before but I had a bag of butterscotch chips that my sister-in-law had bought for me in the US, and this was the first recipe I found that used them. They have a lovely chewy edge and the coconut is a great addition - but they are very sweet! Although I suspect they will be great for my school lunch box tomorrow, the perfect morning tea treat for my first day.

Chewy, Chunky Blondies

2 cups plain flour (I used wholemeal)
3/4 teaspoon baking powder
1/2 teaspoon baking soda
1/2 teaspoon salt / fleur de sel
225g butter, at room temperature
1 1/2 cups (packed) light brown sugar
1/2 cup sugar
2 large eggs
1 teaspoon pure vanilla extract
1 cup chocolate chips
3/4 cup butterscotch chips
1 cup shredded coconut

Preheat the oven to 160 degrees C. Butter and line a 9×13-inch baking pan.

Whisk together the flour, baking powder, baking soda and salt.

Working with a stand mixer, preferably fitted with a paddle attachment, beat the butter on medium speed until smooth and creamy. Add both sugars and beat for another 3 minutes, or until well incorporated.

Add the eggs one by one, beating for 1 minute after each addition, then beat in the vanilla.

Reduce the mixer speed to low and add the dry ingredients, mixing just until they disappear into the batter. Using a rubber spatula, stir in the chips, nuts and coconut.

Scrape the batter into the buttered pan and use the spatula to even the top as best you can.

Bake for about 40 minutes, or until a knife inserted into the center of the blondies comes out clean. The blondies should pull away from the sides of the pan a little and the top should be a nice honey brown. Transfer the pan to a rack and cool for about 15 minutes before turning the blondies out onto another rack. Invert onto a rack and cool the blondies to room temperature right side up, before cutting into squares or bars

Recipe from Dorie Greenspan, Baking: From My Home to Yours

Monday, April 26, 2010

I have a fear of triangles...part 2


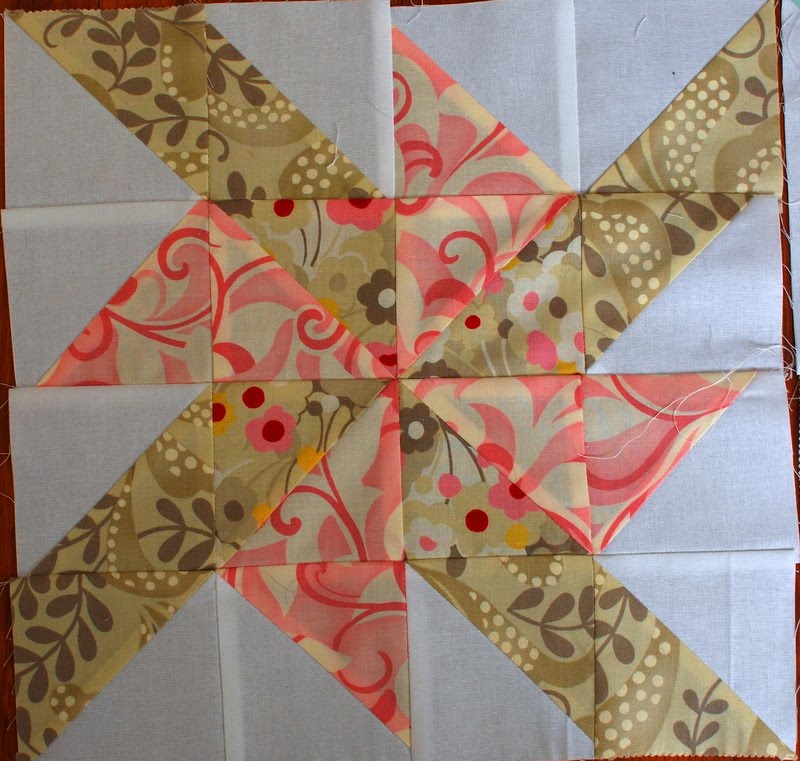
Well my sewing mojo has well and truly returned and I spent much of the weekend at my machine. Although Rachel's quilt along began 9 weeks ago, I started on Saturday and have managed to get all 16 blocks done. Not bad for someone with triangle phobia!

A few of my favourite blocks

Pretend those loose threads aren't there please!

I don't think I'll make Rachel's 2 week challenge to get it all together, quilted and bound, but hopefully I'll at least have the top together in the next fortnight. I think I'll go with white sashing and cornerstones - maybe mini pinwheels.

I'm also thinking I might have this one quilted professionally as the thought of stippling over those bulky seams is a little scary. But I'm not sure whether to go with an all over design or have something different for each block - ideas?

Sunday, April 25, 2010

I have a fear of triangles...


So I started a quilt comprised almost entirely of triangles. Nothing like facing a fear head on. I really love pinwheel quilts so I decided it was about time I make my own. I am following Rachel's pinwheel sampler tutorial and using a hunky dory layer cake.

This is what our desk looked like yesterday while I made a start on this quilt - I think I need a bigger desk!

Saturday, April 24, 2010

lucky girl!


Check out what Sarah sent me! I won a retrospective giveaway on her blog, so Sarah sent me the maroon brooch. And I purchased the aqua one from her too - aren't they gorgeous?

I'll be back with some sewing pictures tomorrow.

Thursday, April 8, 2010

Under the sea...

Some sewing over the weekend - no idea where this is going as yet, but I'll see where it takes me. I usually plan my quilts, but I thought I might just play with this one, and I am really enjoying it. I am also taking notes and photos, so perhaps it may become a tutorial in the future...or maybe I'll even get up the courage to submit it to a magazine...

I also had another go at some macarons and I really think I am getting there, although the tops weren't as smooth as last time. Same recipe, but this time I substituted 35g of almond meal for cocoa, and made a dark salted chocolate buttercream to fill them. Seriously yum!

Sunday, April 4, 2010

Happy Easter!

The Easter bunny was very generous in our house this morning - you'd think there were kids living here, but this stash is for 2 (childish perhaps?) adults!

I hope you are having a wonderful long weekend!

Friday, April 2, 2010

French Macarons - take 1

Inspired by Lisa's French baking and my workmate Anita's delicious macarons of the pistachio variety - I decided to have a go at the infamous French macaron (with Tilly's help of course!).

To say I was nervous about making these is an understatement! Googling "French Macarons" reveals a multitude of pages about the intricacies of baking these gorgeous biscuits. So I read and read and read. I found many different recipes and even pages on troubleshooting. Then I decided to give it a shot - and I was pretty stoked with the result! Their 'feet' were a little splayed, and the inside a little sticky, but otherwise they were great. The troubleshooting guide tells me that my oven was probably a little too warm - file that away for next time.

I used the basic recipe from macaron extraordinaire Tartlette, with no colouring or flavouring in the biscuit. And I made a chilli chocolate butter cream with which to fill them.

FIngers crossed I can perfect them next time.